
")


External pollen trap Kogelnik
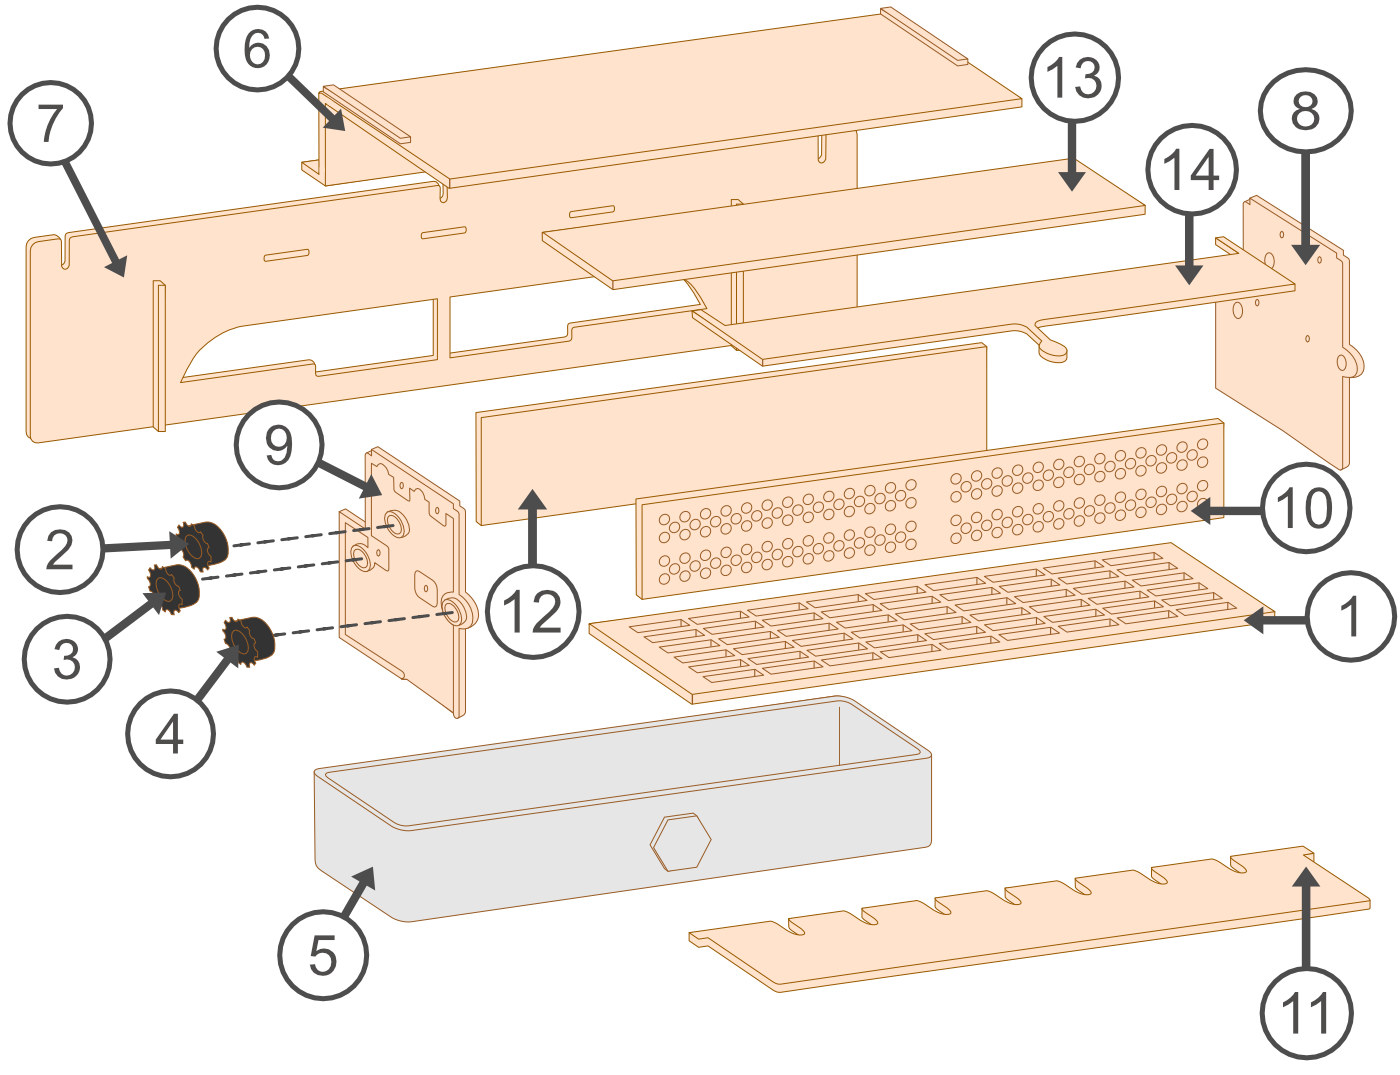
| no. | Name | num. |
|---|---|---|
| 1 | Mesh screen | 1 |
| 2 | Pollen screen adjustment | 1 |
| 3 | Drawer protection plate adjustment | 1 |
| 4 | Alighting platform adjustment | 1 |
| 5 | Drawer | 1 |
| 6 | Pollen trap cover | 1 |
| 7 | Mounting plate | 1 |
| 8 | Right hand plate | 1 |
| 9 | Left hand plate | 1 |
| 10 | Pollen screen | 1 |
| 11 | Alighting platform | 1 |
| 12 | Drawer protection plate | 1 |
| 13 | Separator | 1 |
| 14 | Ventilation gap insert | 1 |
Installing the pollen trap
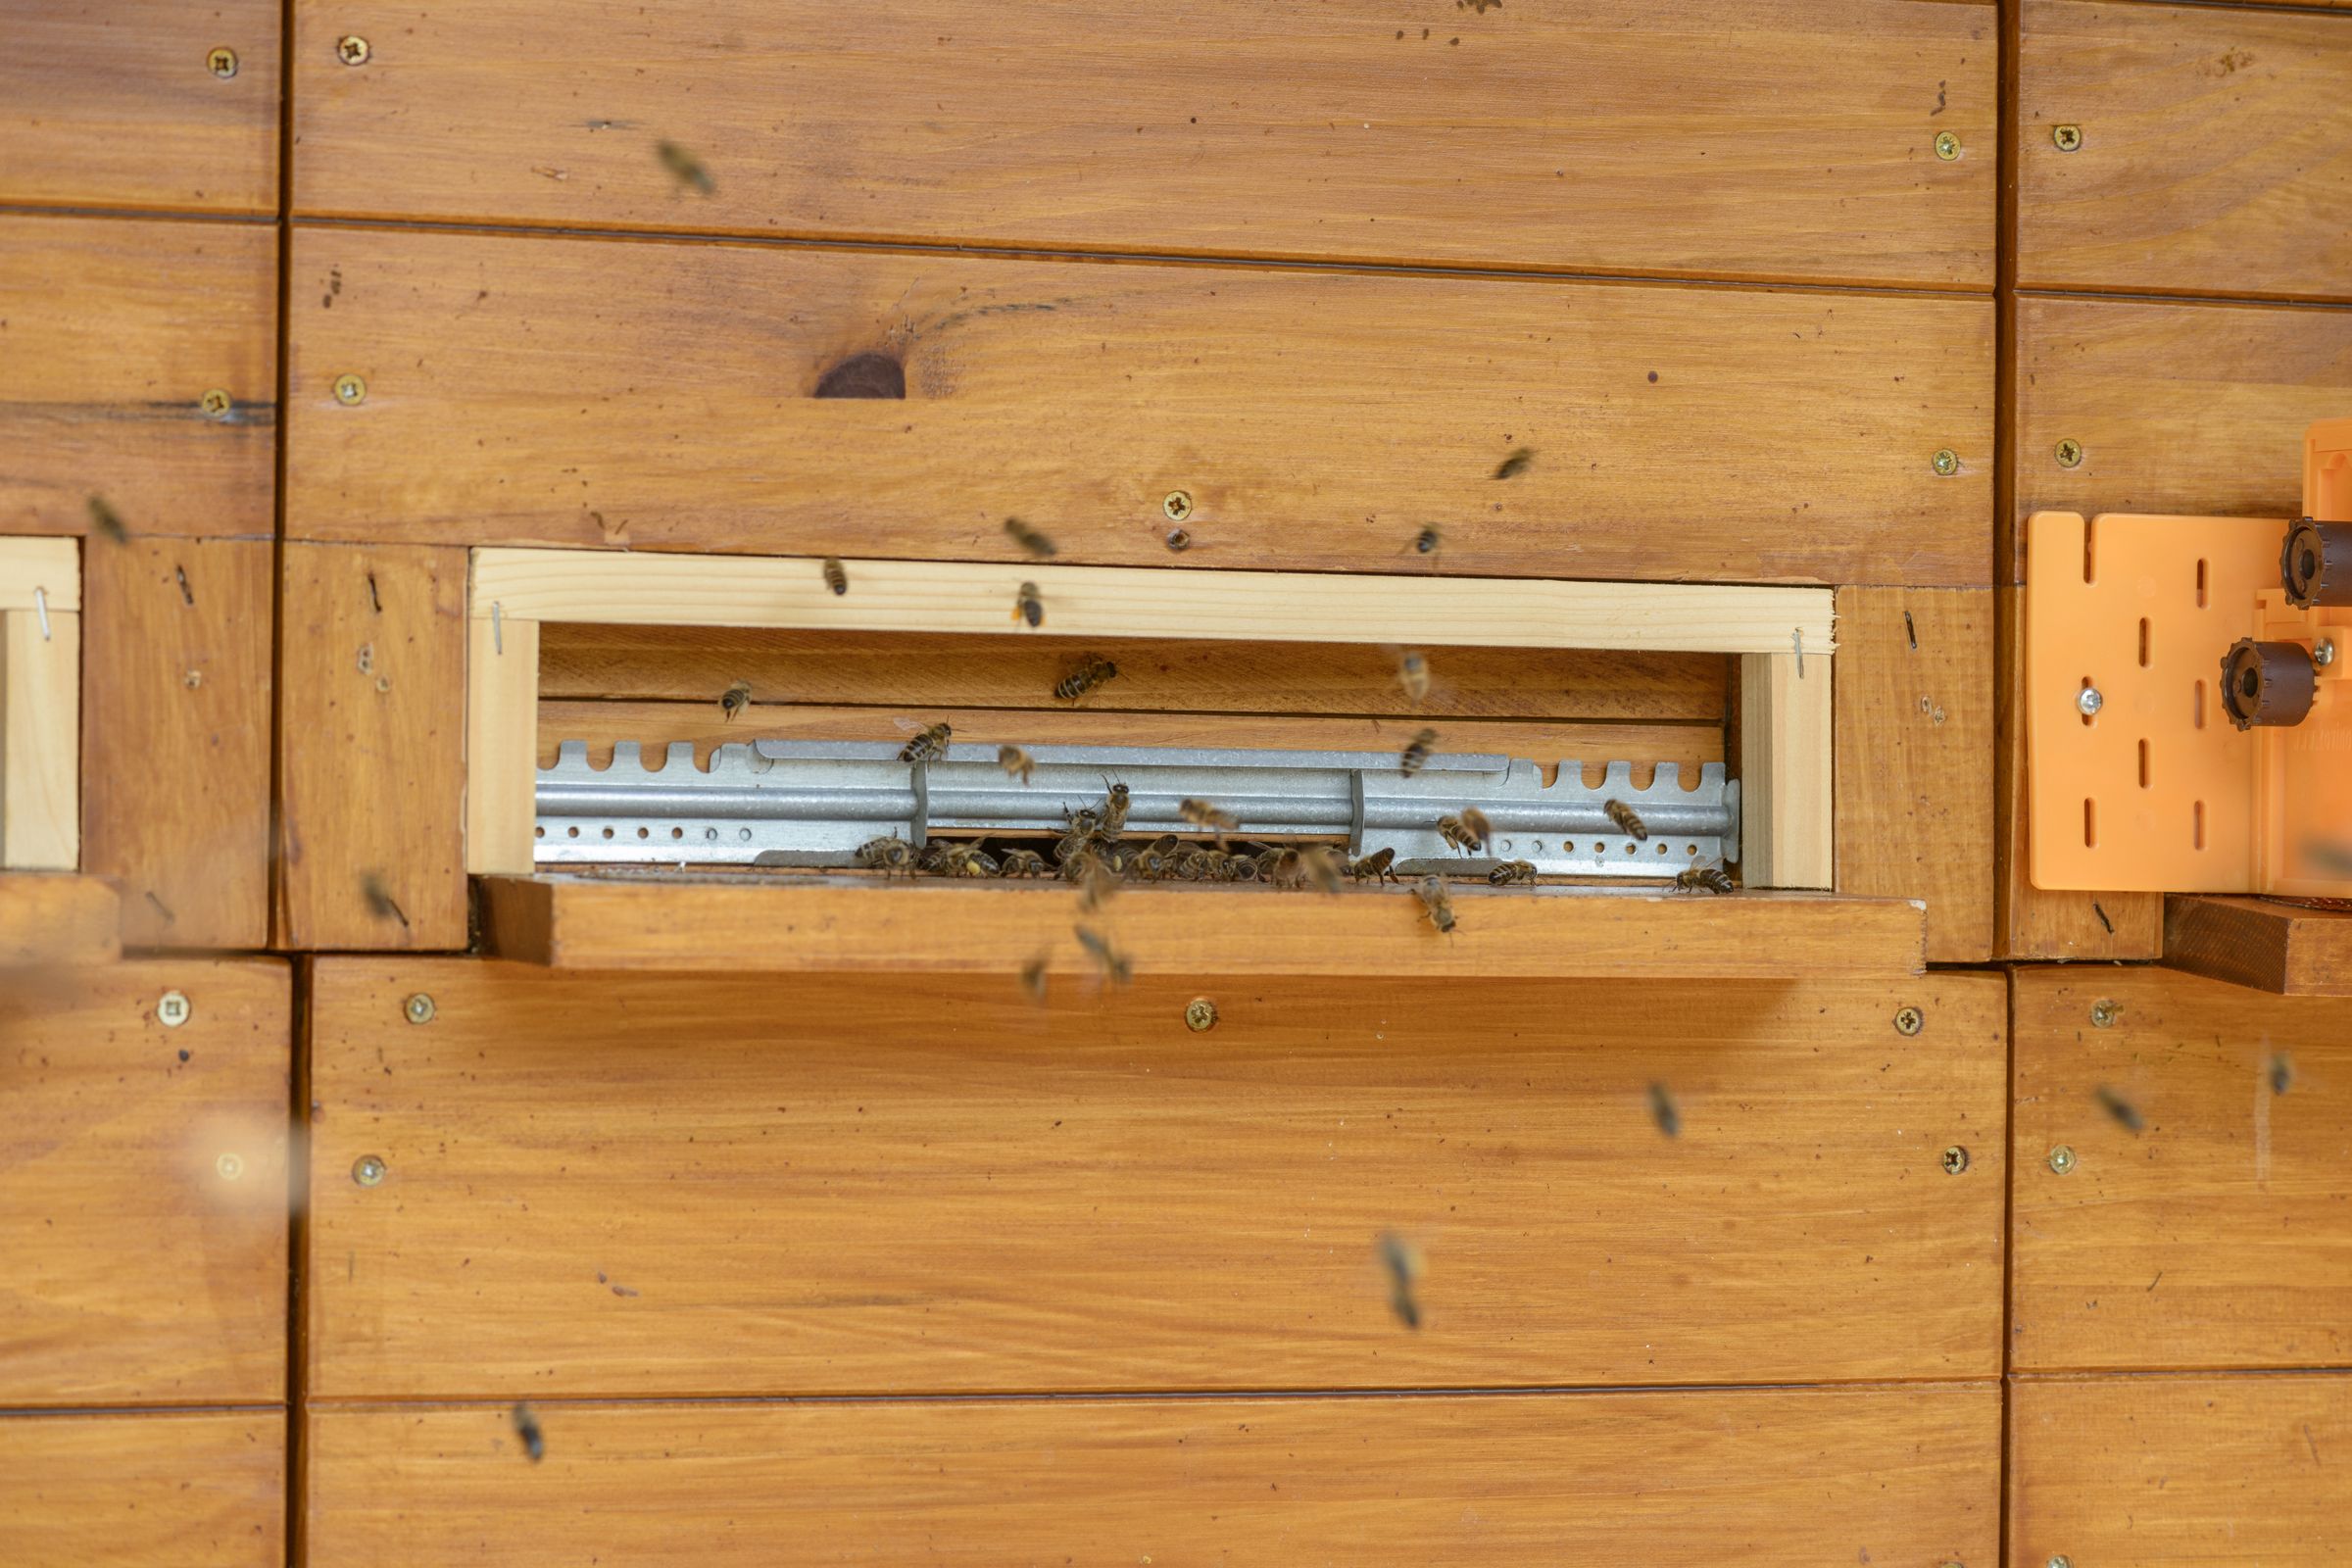
ALWAYS remove the entrance reducer before installing the pollen trap if the mounting plate is in contact with the entrance reducer to allow the bees to pass through freely. If the entrance reducer cannot be removed, cut off the lower (narrowest) part of the mounting plate.
With hives that allow for about a centimetre wide gap between the mounting plate and the reducer, leave the entrance reducer in place. Before installing the pollen trap on this type of hive, it is recommended to make and install wooden inserts (see Picture below).
Ventilation gap insert
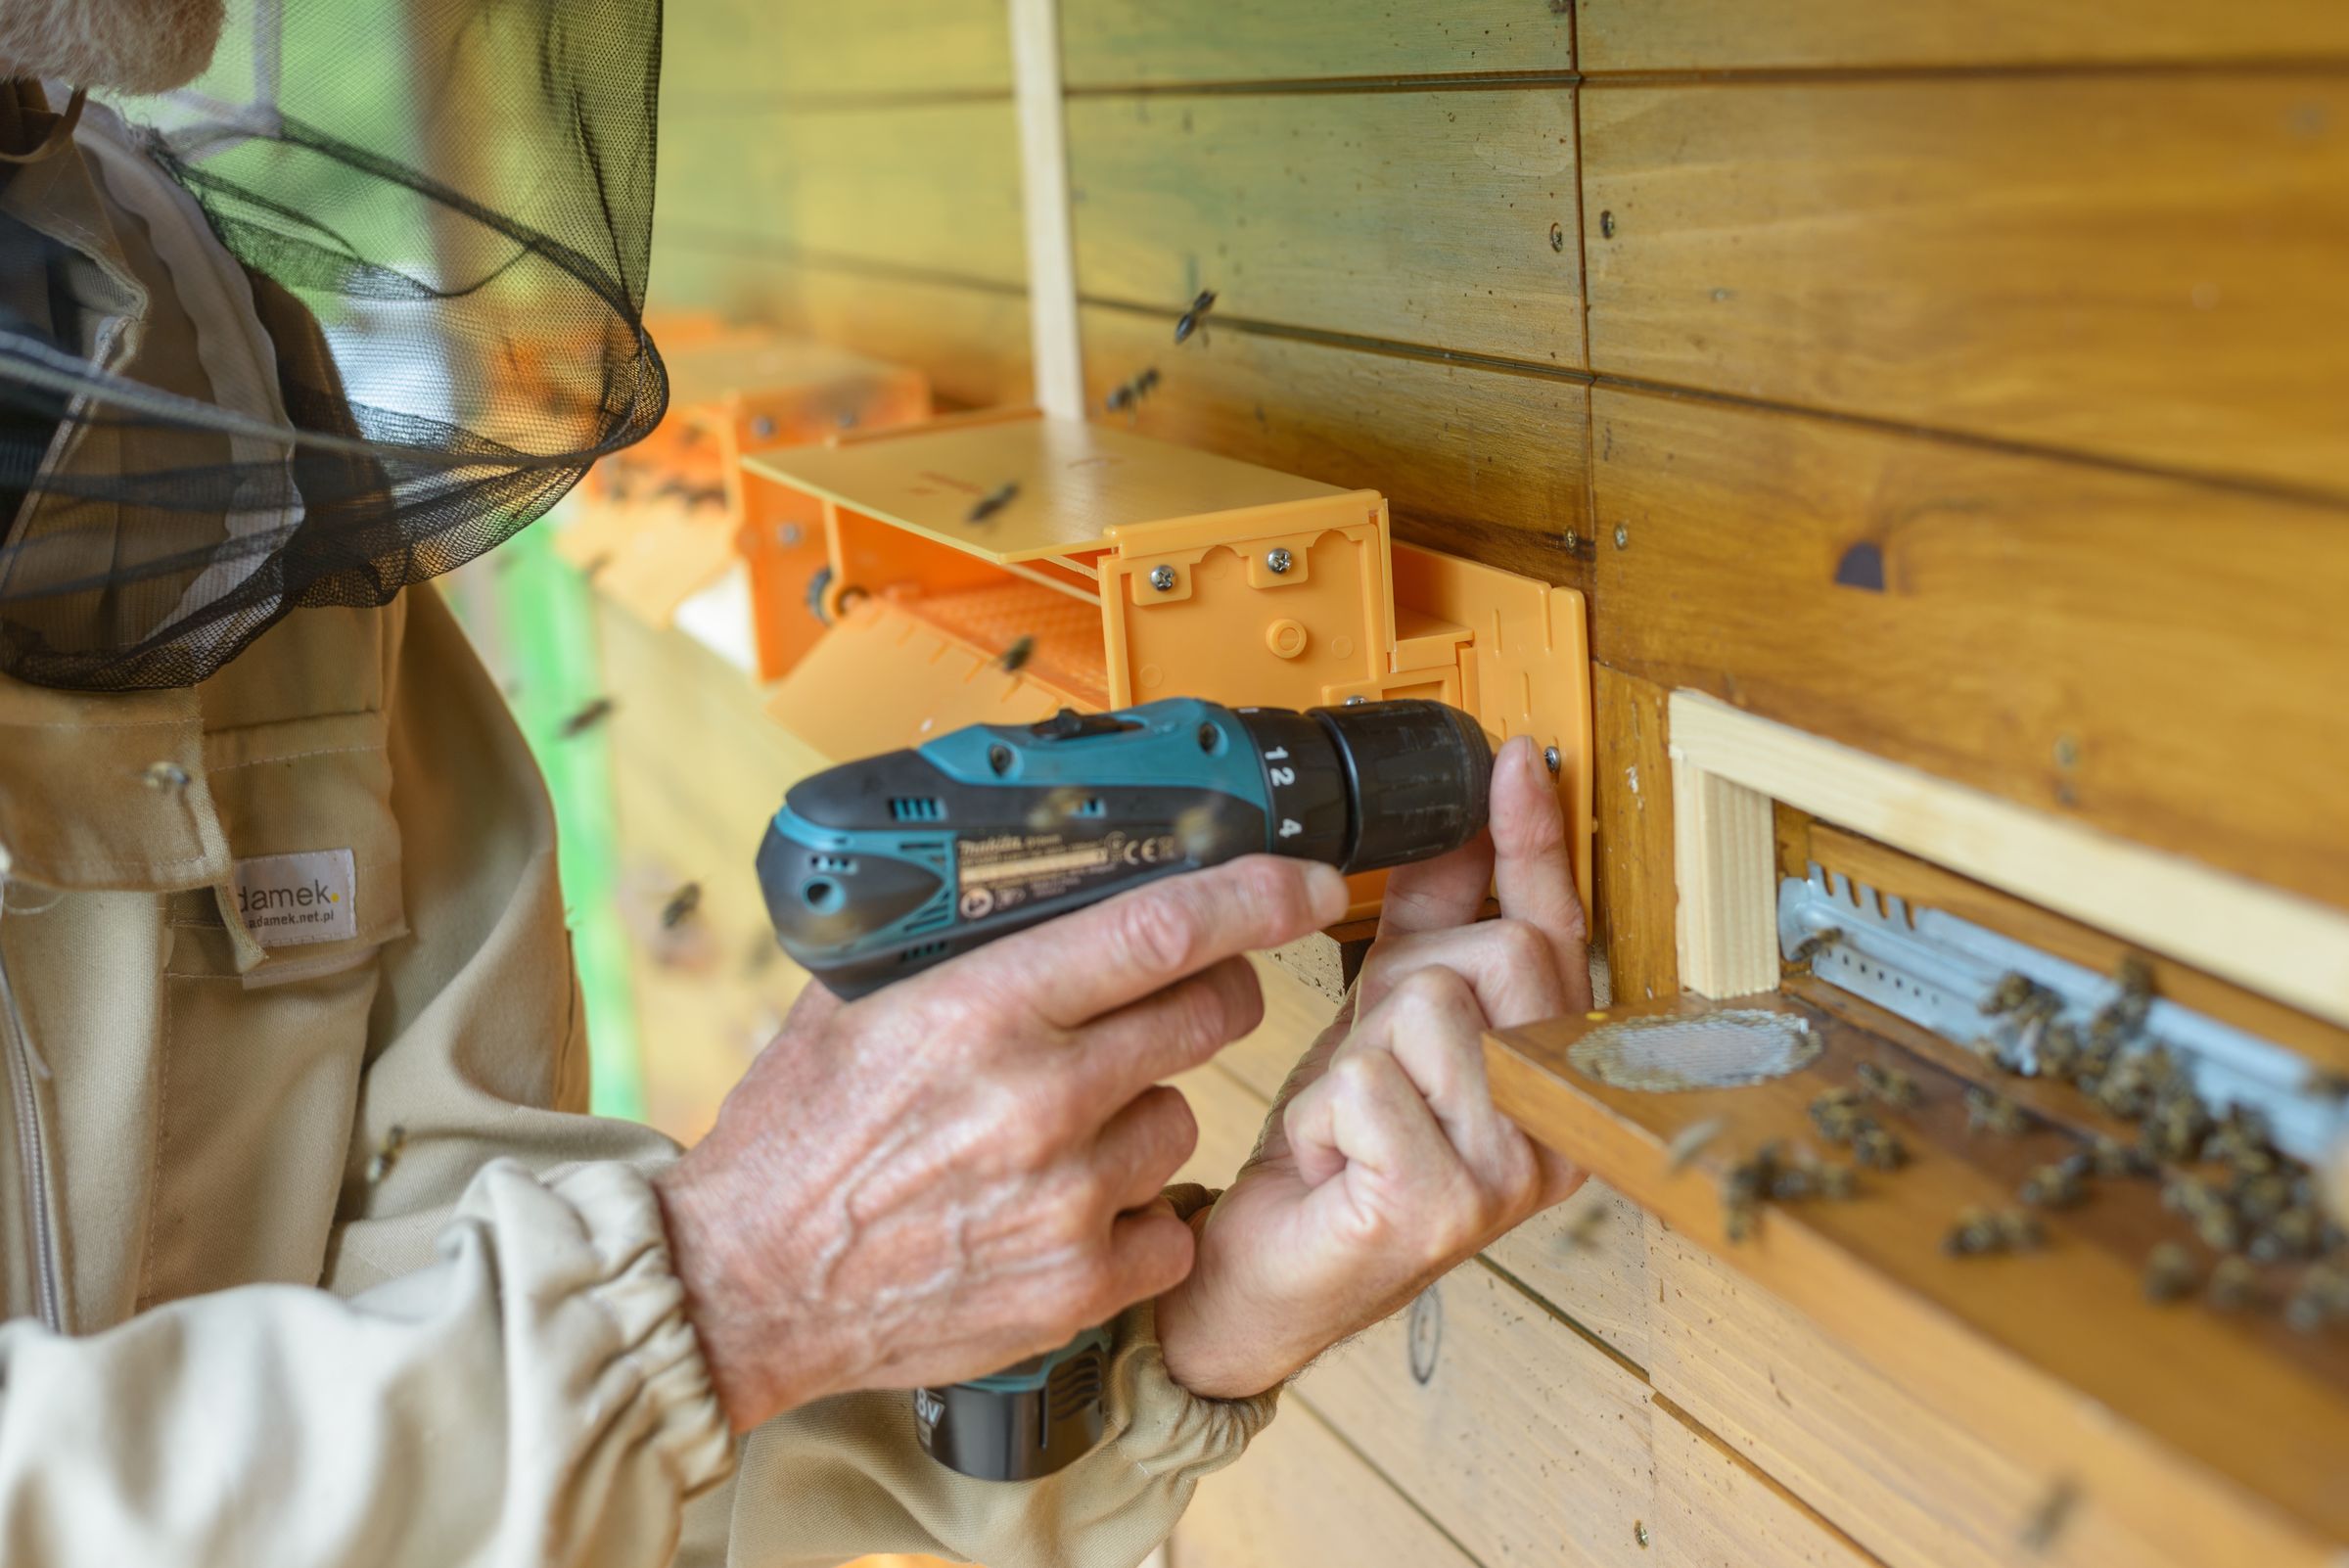
The pollen trap can be mounted to a beehive in a matter of minutes. Insert two screws (3.5 x 18 mm) into the air gaps on each side of the mounting plate and tighten them to fix the pollen trap to the hive.
Do not twist the mounting plate in any way. It has to remain straight and flat. A small drill driver can be very handy.
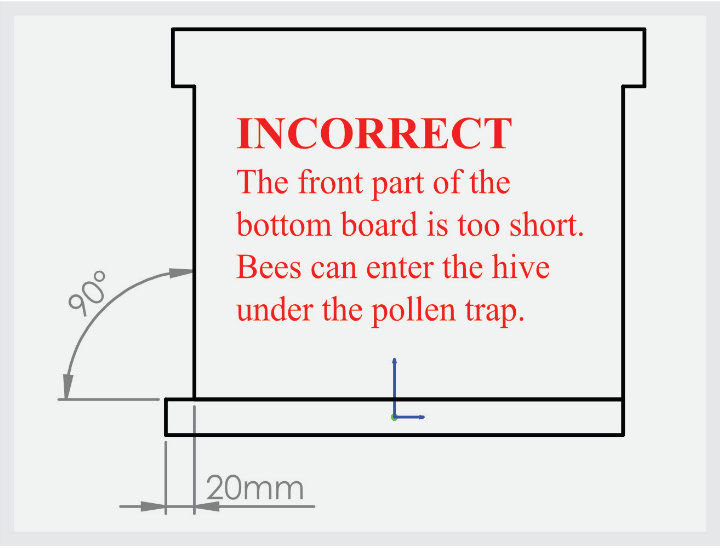
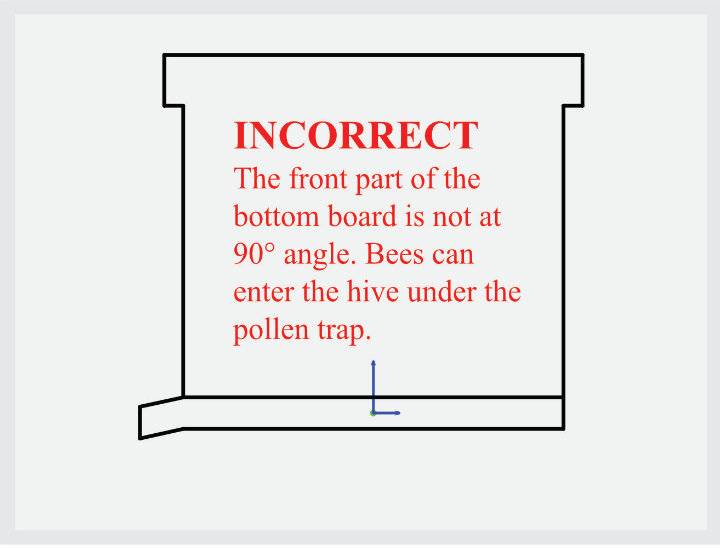
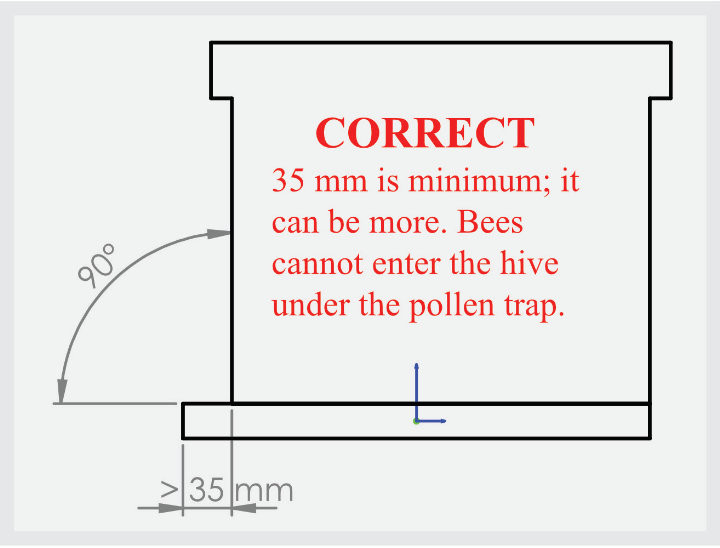
In case you find pollen under the beehive, look at the pictures below.
Helpful tips: Acclimatising bees to the pollen trap
Install the pollen trap in the early spring. Turn the pollen screen into a horizontal position using the adjuster (2). Leave it in this position for 7 days. This will allow the bees to pass over the mesh screen (1). If you see any bees in the drawer, the drawer is not pushed all the way in.
If you notice chalk brood, do not remove fresh pollen. Turn the pollen screen using the adjuster (2) into a horizontal position to allow the bees to pass freely, or remove the pollen trap.
Design construction
 ALWAYS remove the entrance reducer before installing the pollen trap if the mounting plate is in contact with the entrance reducer to allow the bees to pass through freely. If the entrance reducer cannot be removed, cut off the lower (narrowest) part of the mounting plate that prevents moisture transfer from the hive to the pollen trap. With hives that allow for about a centimetre wide gap between the mounting plate and the reducer, leave the entrance reducer in place. Before installing the pollen trap on this type of hive, it is recommended to make and install wooden inserts.
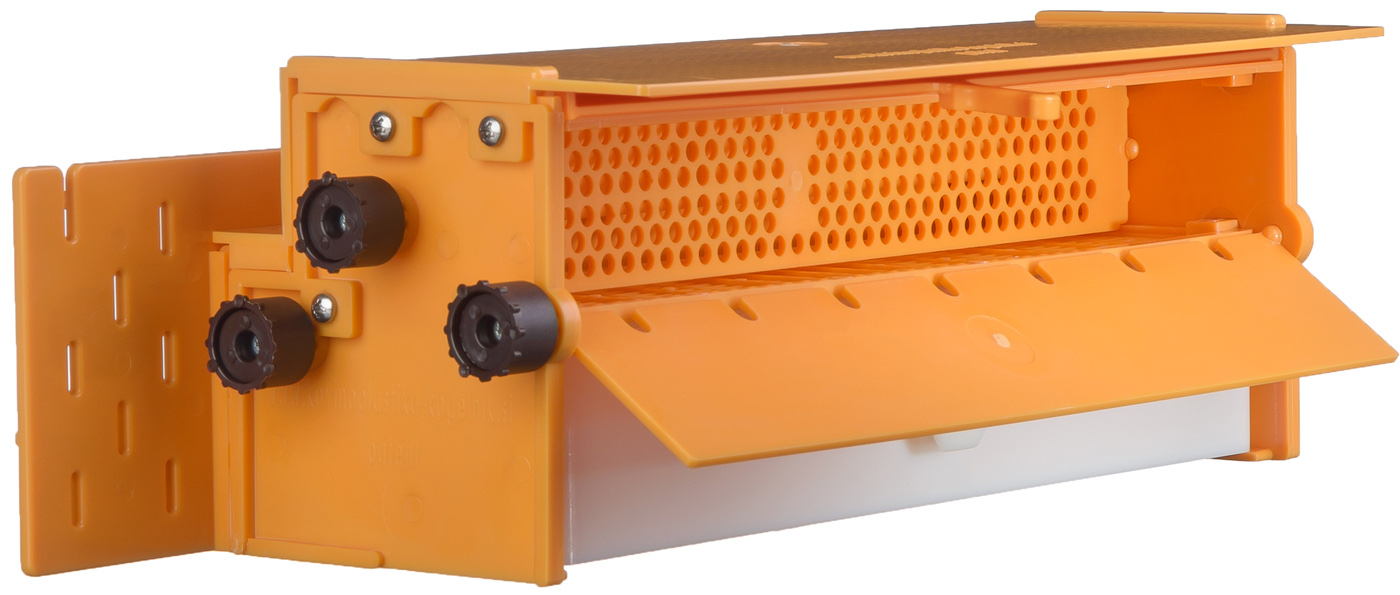
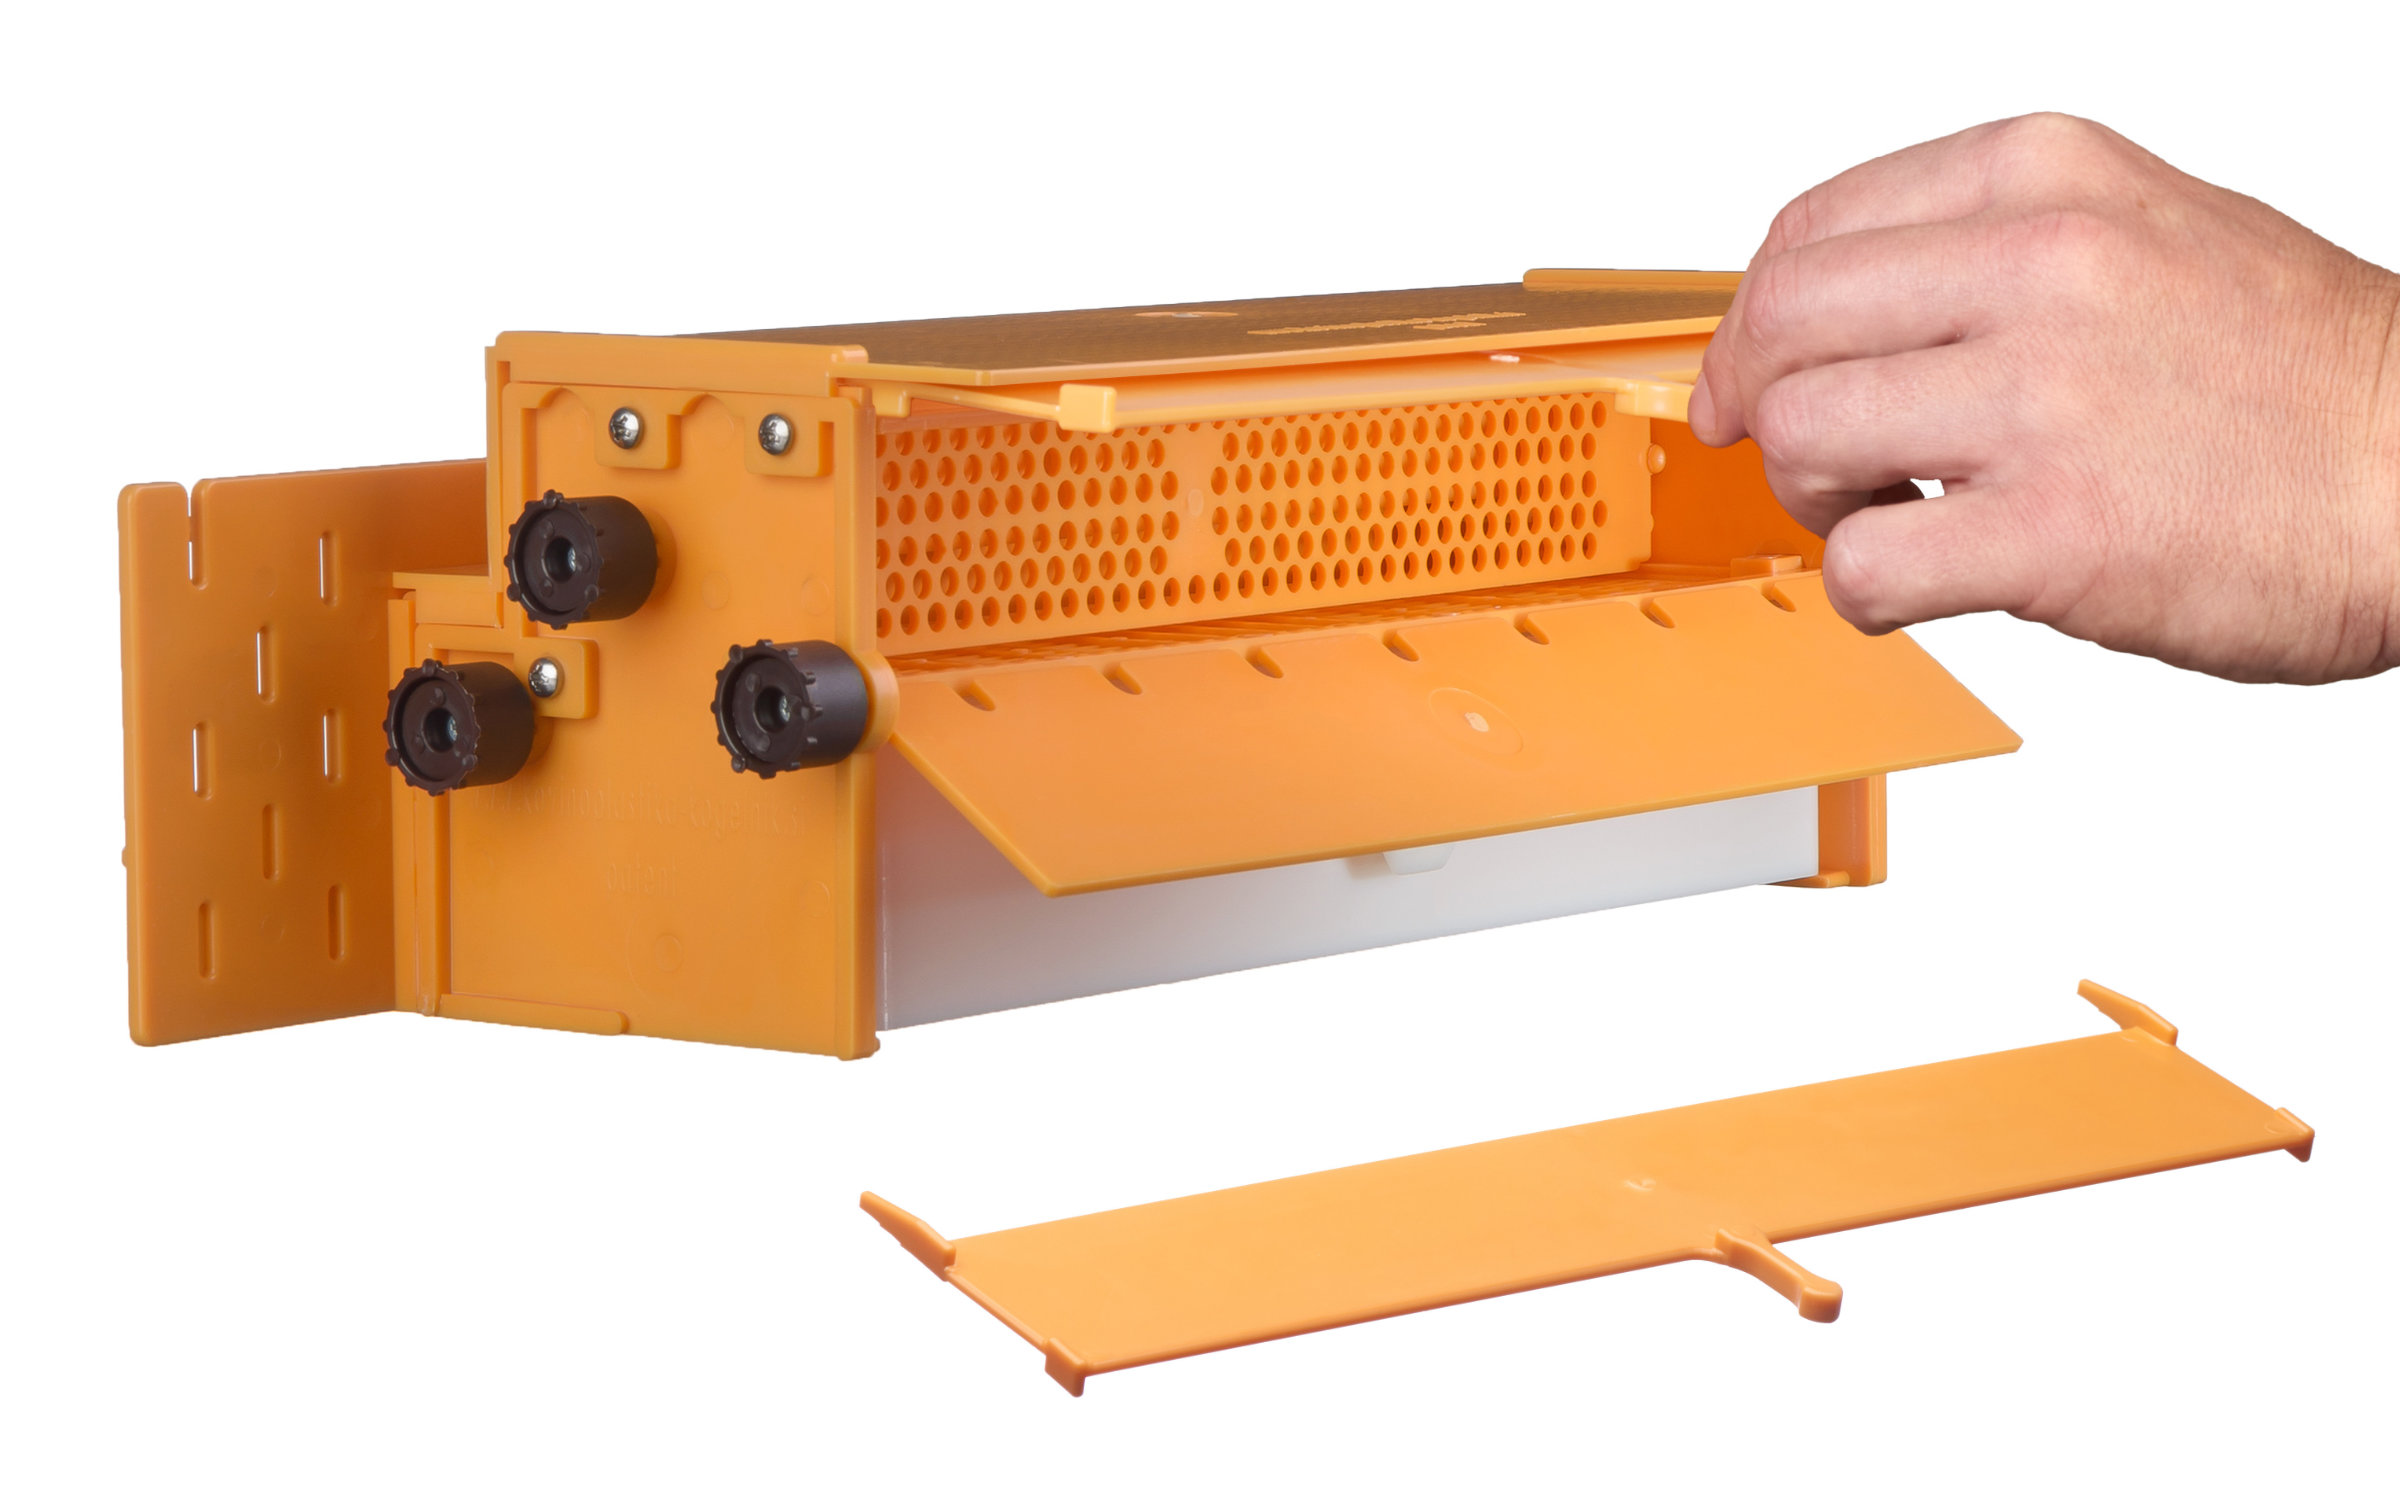
The amount of moisture in the pollen trap varies according to outside temperature, hive ventilation, and the number of bees in the colony. Opposed to other known pollen collecting drawers, this drawer is made without any ventilation gaps on the bottom and sides; this is due to three hygienic reasons: (1) the drawer is easier to clean; (2) the absence of gaps prevents other types of insects to feed on pollen; (3) in bad weather (humidity over 60%), the pollen absorbs moisture from the air, which is not the case if these ventilation gaps are not present. Contrary to the established belief, I am of the opinion that the collecting drawers should not allow for free air circulation. Wire mesh screen drawers are also difficult to clean due to obvious reasons. I empty the collecting drawers every night; some colonies can completely fill a drawer in a day. I turn the pollen screen using the adjuster (2) into a horizontal position to allow the bees to pass freely and collect some pollen for their own needs in the morning. After an hour or two, I close the pollen screen using the adjuster (2), and clean the pollen collecting drawer every day.
Cleaning is easy due to smooth walls. In the event of extreme temperature changes and/or very efficient bee colonies, a very small amount of water can be found in the drawer; I simply clean it with a paper towel, and close the screen by turning the adjuster (2). Drops of water may also be found on the underside of the cover, which are consumed by the bees. The sliding rear plate protects the drawer from condensation, stops the bees from entering the drawer, and protects the beekeeper. Condensation is partially prevented also by the upper separator above the pollen screen. The drawer is protected from the rain by the moveable alighting platform and the pollen trap cover.
The volume of the collecting drawer amounts to 750 ml. If the pollen trap is used correctly and appropriately, the pollen should be very clean. Namely, when the bees clean the hive, they throw the waste out through the opening under the pollen trap cover. This opening serves as a ventilation gap and free movement of drones; bees can also swarm through this opening. If a ventilation gap insert is put into this opening, we can prevent the bees from swarming; however, this also causes an increase in humidity of the pollen trap, so caution is needed. The ventilation gap insert can be mounted for a day or two when we notice that the pollen-carrying bees enter the hive through the opening for drones.
Invented by: Roman Kogelnik
Owner: Kovinoplastika Kogelnik d.o.o.
Onkraj Meže 16, 2392 Mežica, Slovenia
![]()
I wish you great pleasure in your future beekeeping endeavours with Pollen traps Kogelnik.
E-mail: This email address is being protected from spambots. You need JavaScript enabled to view it.
www.kovinoplastika-kogelnik.si
This pollen trap is a patented product.